


Imaginative and uniquely eye-catching, textured wall art has become one of the most popular styles in modern home decor. From minimalist plaster canvases to sculptural abstract pieces, textured art introduces depth, movement, and tactile interest that flat prints simply cannot replicate.
The good news is that you do not need to be a professional artist to create beautiful textured artwork. With a few affordable materials and some simple techniques, anyone can make stunning DIY textured wall art at home, or even on your computer with wholly digital methods that replicate the illusion of texture and depth.
This guide will walk you through how to make textured wall art step by step, including the materials you need, the most popular techniques, and tips for achieving a modern gallery-quality finish.

Understanding Textured Wall Art
Textured wall art refers to artwork that either incorporates or creates the illusion of physical dimension and raised surfaces rather than relying solely on color or imagery. Instead of paint sitting flat on a canvas, materials such as spackle, plaster, or joint compound are applied thickly and sculpted into patterns, ridges, or shapes. In digital variants, these techniques are replicated to create similar effects (optical illusions).
These dimensional surfaces catch light differently throughout the day, creating subtle shadows and highlights that add depth to the piece. This is one reason textured art has become so popular in contemporary interior design. Neutral sculptural canvases fit beautifully into modern, Scandinavian, and minimalist spaces while still feeling artistic and handmade.
Many professional artists use plaster-based materials to build up layers on canvas, but the same effect can easily be achieved using affordable household materials available at most hardware stores.
Materials Needed for Traditional DIY Textured Wall Art
Before starting your project, gather the basic materials you will need.
A blank canvas is the most common surface for textured art. Stretched canvases are easy to work with and lightweight enough to hang on walls. Larger canvases tend to showcase texture especially well.
The main ingredient for creating texture is a thick paste such as:
Spackle
Joint compound
Plaster
Joint compound is one of the most commonly used materials because it spreads smoothly, dries hard, and is inexpensive.
To shape and sculpt the material, you can use a variety of tools such as:
Putty knives
Palette knives
Drywall scrapers
Piping bags
Forks
Spoons
Combs
Many artists also use household tools to experiment with different patterns and textures.
Additional supplies include:
Acrylic paint or latex paint
Sandpaper
Painter's tape
Wood glue
Marble powder (optional)
Matte spray sealer
Protective drop cloth
Once you have your materials ready, you can begin creating your textured artwork.
Preparing Your Canvas
Preparation is an important first step when making textured wall art.
Place your canvas on a flat protected surface such as a work table covered with plastic or a drop cloth. Texture materials can be messy, so it helps to protect the area before beginning.
Most canvases come pre-primed, but if yours is not, apply a layer of primer to help the texture adhere better.
At this stage you can also plan your design. Some artists sketch light guidelines on the canvas, while others prefer to work more freely and allow the texture to develop organically.
Applying Texture to the Canvas
Once your canvas is prepared, the fun part begins.
Using a putty knife or palette knife, scoop up your joint compound or spackle and spread it across the canvas. Apply it generously so there is enough thickness to create visible texture.
After spreading the compound, manipulate it using your chosen tools. Drag the knife across the surface to form ridges, carve patterns, or swirl the compound into waves.
You can experiment with different motions such as:
Horizontal sweeps
Vertical ridges
Circular patterns
Layered textures
Household tools can also create interesting results. A fork can produce repeating grooves, while a comb can create fine parallel lines.
Do not worry about perfection. Many of the most appealing textured artworks rely on natural imperfections and organic shapes.
Popular DIY Textured Art Techniques
There are several popular techniques used to create textured wall art. Each produces a unique aesthetic.
Joint Compound or Spackle Method
This is the most widely used DIY method.
Apply joint compound directly to the canvas using a putty knife and sculpt the surface using sweeping motions or layered strokes. This technique works well for modern abstract designs with flowing movement.
For a more durable and professional mixture, you can create a custom texture paste by combining:
1 cup marble powder
½ cup wood glue
3 tablespoons white acrylic paint
This mixture creates a thicker plaster-like compound that dries extremely solid and holds shape well.
Baking Soda Texture Paint
Another simple technique involves creating textured paint.
Mix equal parts white latex paint and baking soda. The baking soda creates a fluffy, grainy texture that adds subtle dimension to the paint, which can be good for creating realism or detailed fantasy art.
Apply this mixture with a brush to create soft textured surfaces. It works especially well for minimalist abstract art or layered neutral designs.
Modern Geometric Texture
If you prefer crisp shapes rather than organic patterns, painter's tape can help create geometric designs.
Apply painter's tape to the canvas in straight lines, triangles, or other shapes. Spread spackle within the taped sections and texture the surface using a palette knife.
While the compound is still wet, remove the tape carefully. This leaves behind clean geometric edges with raised texture inside each shape.
Natural Organic Patterns
Organic textures are inspired by natural forms such as sand dunes, waves, or flowing fabric.
Use a piping bag filled with joint compound to create wavy or swirling lines across the canvas. You can also drag a drywall scraper across the surface to create broad sweeping ridges.
These natural movements give the artwork a sculptural, almost landscape-like appearance.
Sculptural Elements
For dramatic dimensional artwork, you can build up larger shapes before applying plaster.
Glue lightweight materials such as cardboard shapes, foam board pieces, or wooden letters onto the canvas. Once secured, cover them with plaster or joint compound.
The result is a sculptural surface with raised forms emerging from the canvas, creating strong visual depth.
Allowing the Texture to Dry
After finishing your design, allow the artwork to dry completely.
Most textured pieces need between 16 and 24 hours to dry depending on the thickness of the compound and humidity levels.
Avoid touching or painting the surface until it is fully hardened. If the texture layer is especially thick, you may want to allow extra drying time.
Sanding and Refining the Surface
Once the piece has dried, inspect the surface for any sharp edges or unwanted bumps.
Use fine sandpaper to gently smooth areas that feel too rough or uneven. Be careful not to sand away the texture patterns you created.
This step helps refine the piece and prepares it for painting or finishing.
Painting and Finishing the Artwork
After sanding, you can choose how to finish your textured artwork.
Many modern textured pieces remain white or neutral, which allows the shadows and highlights of the texture to stand out.
For a minimalist look, apply a single coat of white or beige acrylic paint across the entire canvas.
You can also paint the artwork in layers to emphasize depth. A light base color combined with subtle highlights or shading can bring out the sculptural details.
Some artists prefer metallic finishes, monochrome palettes, or soft pastel tones depending on the room's design.
Once the paint has dried, apply a matte spray sealer to protect the artwork. This helps prevent dust buildup and preserves the surface.
Adding a Frame for a Professional Look
A simple frame can dramatically elevate the appearance of DIY textured wall art.
Floating frames made from pine wood are a popular option. These frames create a small gap around the canvas, giving the artwork a gallery-style presentation.
You can build a simple frame using pine boards or purchase a pre-made floating frame for convenience.

Tips for Customizing Your Textured Artwork
One of the best aspects of DIY textured art is the freedom to personalize the design.
You can mix acrylic paint directly into the spackle before applying it to create colored texture from the start. This eliminates the need to paint the piece afterward.
Layering multiple textures can also produce more complex results. Try combining smooth sections with heavily ridged areas for visual contrast.
Texture thickness plays a big role in the final appearance. Thin layers create subtle texture, while thick sculpted layers create bold dimensional artwork.
Cost-saving strategies can also make the project very affordable. Buying canvases during craft store sales and purchasing spackle from a hardware store can keep the total cost surprisingly low while still producing a high-end result.
Why DIY Textured Wall Art Is So Popular
The popularity of textured wall art has grown rapidly in recent years. Many homeowners and designers appreciate the tactile quality and sculptural beauty that textured canvases bring to a space.
Unlike other kinds of artwork, textured pieces feel handmade and unique. Even simple designs can look sophisticated because the raised surfaces interact with light and shadow.
DIY textured art also allows anyone to create large statement pieces without the high cost of professional artwork.
With just a few materials and some creativity, you can transform a plain canvas into a striking piece of modern wall decor.
Creating Digital Textured Wall Art
If DIY crafts aren't your thing but you still love to create art and enjoy the textured aesthetic, it's possible to create similar effects digitally.
For instance, instead of starting from a blank white digital canvas, start from a "watercolor paper" or "textured canvas" background, and set the opacity to 50%. This is one of the techniques I use to create pieces like Tears Edge.
Think about various surfaces that naturally have interesting visual contrast, like brick walls, or hunks of concrete, and incorporate those materials into the design, if only abstractly.
Another technique that I have recently started using, but which took a little getting used to, is creating shadow to your own brushstrokes. This takes thinking outside of the box a little and you might have to experiment before you get the look you want.
Essentially, instead of just paying attention to the lighting of the scene you are drawing, you also should think about the actual brushstrokes you are making on your digital canvas. You might want to intentionally create a wide, sweeping stroke, leaving it somewhat unblended or sticking out in some way. You can then embellish the brushstroke with shadow and lighting, as if it were a three-dimensional object popping off the canvas.
When you combine several of these techniques into one painting, you can often match (or even exceed) the textured aesthetic of physically hand-painted works. The reason why digitally-created textured art can often be more enticing to the eye, is because while it's fairly easy to create depth with spackle and the other techniques outlined above, this doesn't always guarantee an effective optical illusion or a final piece that has that "uncanny" 3D look.
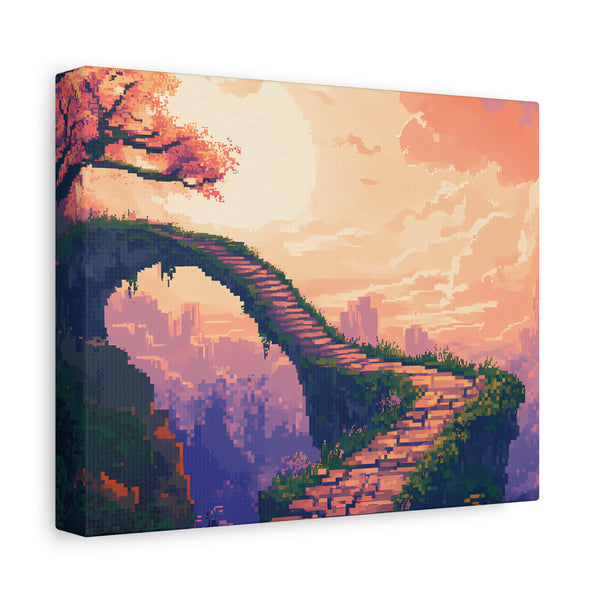
Rich and unique textures and the illusion of strong depth variance is often easier to achieve digitally. Some of the textured wall art featured here at Heart Circle I would imagine would be fairly difficult to reproduce with physical canvas and paint alone!
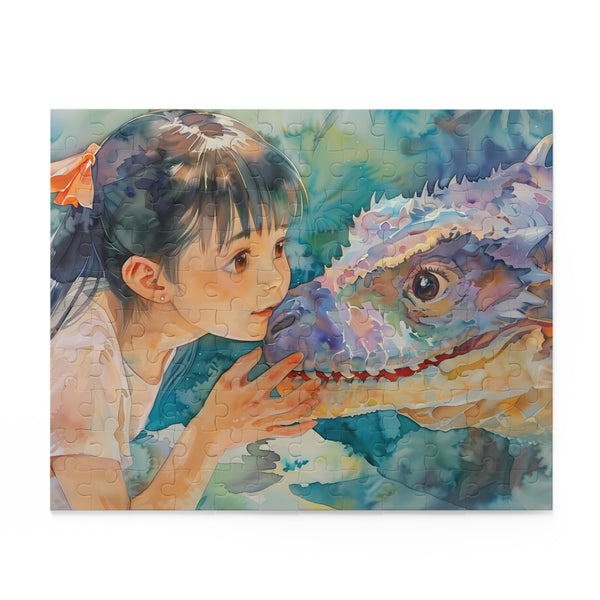
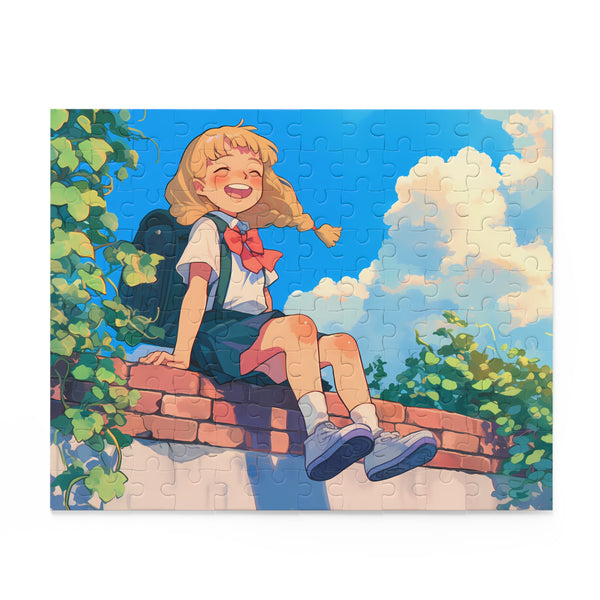
What About Textured Anime Art?
Due to the naturally flat-color nature of most anime art styles, creating textured anime art requires some exploration and finesse. We've been experimenting with pieces that walk the edge of anime and fantasy (you can find some examples in our anime wall art section).
I've found the best "textures" to apply to anime art are different kinds of ruined walls, cobblestone walkways, ancient interiors, and mechanical components (steampunk aesthetic, etc.). Glass and cloth are excellent mediums for anime artwork, but going the textured canvas route certainly produces some unique results.
Enhance Your Space With Wall Art
Learning how to make textured wall art is both simple and rewarding, whether you go traditional or digital. By using materials like joint compound, spackle, or plaster, you can sculpt beautiful dimensional designs directly onto a canvas.
Whether you prefer geometric patterns, flowing organic shapes, or bold sculptural elements, textured art provides endless creative possibilities.
With the right techniques, a little patience during drying time, and a thoughtful finishing process, your DIY textured artwork can look just as impressive as pieces found in high-end galleries.